Anybody can go live on youtube using the Youtube Live streaming tool. This is the favorite tool for content creators as they can engage with their viewers in a more effective way in real time. It’s definitely worth considering if you’re a content creator looking to expand your reach and connect with your audience in a more meaningful way.
The best part is it is a very user-friendly feature on Youtube, don’t worry if you are going to use it for the first time or you have infusions regarding the latest update of youtube live. We have come up with a complete guide to use this feature effectively and easily.
How to verify your Youtube account?
Before you can go live on youtube, you need to verify your account. Look at the given steps below to verify your Youtube account and then stream the live broadcast:
Steps to Verify your YouTube account
if you have not verified your account yet. Follow the below steps to verify.
1. Open Youtube from your mobile or PC.
2. Sign In to Youtube using your email id.
3. Once you sign in, click on the profile icon.

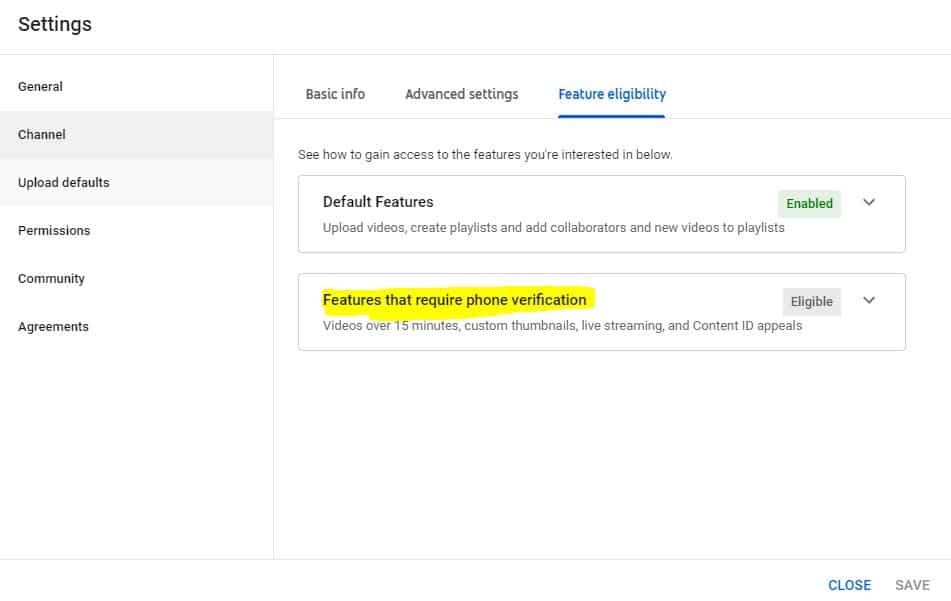
4. Click on “settings”.
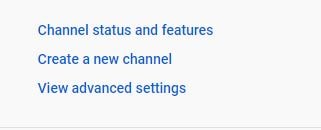
5. Now click on “channel status and features” under the account
6. And then click on “phone verification”
7. And now select country and verification source either text or call and then enter a phone number.
8. You will receive a call or SMS based on the verification source you selected and enter the verification code received.
9. Click on “submit” to verify your account.
Now you have successfully verified your Youtube account. Now your account has some extra features included.
- Upload videos longer than 15 minutes.
- You can add custom thumbnails.
- Go live on Youtube.
- Appeal content ID claims.
Once you verified your account within 24 hours you will be able to do live streaming from your computer webcam or from an encoder or mobile.
Note: If you are using your mobile device to go live on youtube then you must have a minimum of 1000 subscribers.
Btw, This limit is only applicable to mobile not to webcam and encoder.
Youtube Guidelines For Live Streaming
Now take a close look at these guidelines before going live on youtube:
What you can stream on YouTube?
You can stream anything like face-to-face interaction with the audience, concerts, gaming, conference, music, etc.
But all the content must adhere to Youtube terms of service and community guidelines.
If your content is violating the terms of service or community guidelines then Youtube may block you for 3 months.
And they will not allow you to stream on youtube directly or from other channels until your account is active again.
How to Go Live On Youtube?
There are three ways to stream on YouTube:
If this is your first live stream then it may take up to 24 hours after the account verification to start live streaming.
- Mobile.
- Webcam (PC / Computer)
- Encoder
Go live on YouTube using mobile
To start live streaming on mobile, a YouTube account must have a minimum of 1000 subscribers.
1. Open the Youtube app on your phone or tablet.
2. From the bottom click on the “+” icon and select “Go Live”
3. To enable live chat, age restriction, and more tap more options and then show more and then tap next.
4. To start streaming tap create channel and share screen.
5. Click on go live.
6. To end streaming tap finish and the streaming will be saved under archive for later use or you can delete the archive at any time.
You can schedule the live streaming later under more options.
1. To start scheduled streaming, open the Youtube app from your mobile or tablet.
2. Click on the “+” icon located at the bottom of the screen and tap go live.
3. Click on the calendar to select the scheduled streaming.
4. Once you select tap go live to start.
Go live on YouTube using a webcam
To start live streaming from your computer or laptop you just need a webcam and internet connection to start live streaming.
1. Open Youtube from the desktop.
2. On the top right side click on the “ camera icon ![]() .” and tap “Go Live”.
.” and tap “Go Live”.
3. From the left sidebar select “webcam”.
4. Enter a title and description, and select a privacy setting.
5. For more settling like enabling live chat, add tags, chat settings, age restrictions, and more, tap more options and select advanced settings and then click next.
(You can do this at any time whether your stream is live or not)
6. Now your camera will take a thumbnail.
7. Once you are done with the setting, click on “Go Live”.
8. Once streaming is done, click on “End Stream” located at the bottom of the screen.
The streamings up to 12 hours long will be archived automatically for later use and you can delete the archive at any time.
You can schedule the live streaming for later dates under more options.
1. Open Youtube from the desktop.
2. On the top right side click on “camera![]() ” and tap Go Live.
” and tap Go Live.
3. And then from the left sidebar select manage.
4. Select the scheduled live stream and tap go live.
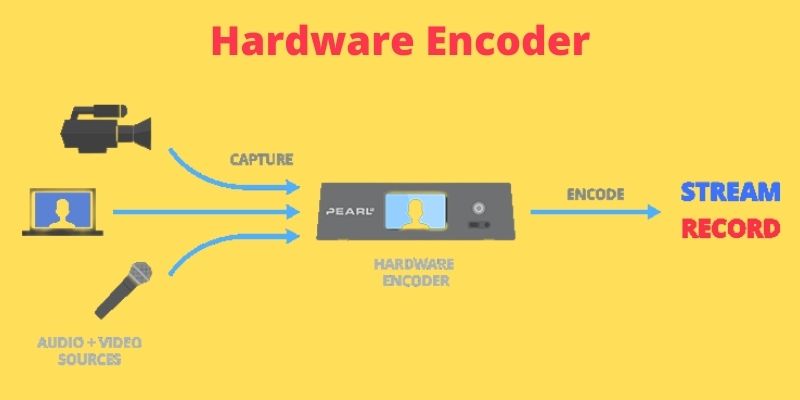
Go live on YouTube using an encoder
What is an encoder?
The encoder allows you to increase the quality of your live streaming and gives added features like
1. Share your screen or broadcast your gameplay.
2. Use multiple cameras and microphones.
3. Connect external audio & Video hardware.
4. Use multiple audio effects
5. Add special effects on the screen
6. Allows you to screen multiple participants.
7. Encoders let you set up layouts.
There are two types of encoders which are software encoders and hardware encoders.
A software encoder is an application that runs on your computer while a hardware encoder is a physical part of a computer.
If you are entry-level and just getting into live streaming then software encoders are best for you than hardware encoders
Software Encoders:
Here are the best software encoders verified by Youtube which allow you to record videos, live stream, and share your gameplay.
These powerful features help you to grow, engage and monetize.
1. Stream labs OBS
It is free professional open Broadcast software for live streaming and recording. Free Open source software is available for both mobile and PC.
Features:
- Layout editor
- Selective Recording
- Replay Buffer
- Game Overlay
- Remote control app
Support Platforms:
YouTube, Twitter, and Facebook.
2. Gamecaster
Gamecaster is designed for gamers by gamers. The mission is to provide the best quality and 100% lag free and let users focus on the game while Gamecaster sets up everything for you.
Feature:
- Easy to use
- No technical knowledge is required.
- Stream and earn rewards.
- Make your own overlay or choose the animated overlay
- Simple scene editor
- Integrated with Spotify, streamlabs, Restream, Elagato.
Support Platforms:
YouTube, Twitter, and Facebook.
Hardware Encoders:
Here are the best hardware encoders which allow you to record and live stream instantly by connecting the external camera, cam recorder microphone, to the hardware encoder and stream it on Youtube for high-quality streaming.
1. Elgato
Allows you to stream and record instantly and the starting price is $158.90
2. Slingstudio
It is a wireless multi-camera broadcasting platform. Monitor, record, switch, edit and stream live HD-quality video wirelessly.
The price of the full bundle starts at $1,745.00 including Slingstudio Base Hub, Cameralink, Battery, Backpack, and Anker 5-in-1 USB-C Expander Adapter.
Factors to be considered before you go live on YouTube
We all do live streaming with a goal to join more audiences and engage the audience till the end. So to run a successful live stream we should check the below factor.
1. Title:
Make sure your title is a strong keyword so that every Youtube user who searches the subject can get your live stream on top of the Youtube search result.
2. Description:
Describe your topic or objective, in short, that should engage the audience to join your live streaming.
But do not forget to add hashtags (add up to 15 hashtags but YouTube consider them as an over-tagging. 4-6 tags are best for any YouTube Video)
3. Thumbnail:
Youtube Thumbnail attracts more to the audience so choose the strong thumbnail which must reflect your objective.
And the thumbnail resolution should be 1280×720 and the size of the thumbnail should be under 2MB.
4. Choose Time:
We must choose the time to go live on Youtube based on the user liking when your videos get the most views.
You can see the audience scrolling data with the help of Youtube Analytics. So choose the time based on the target audience.
5. Check Setup: Make sure your setup is ready to go live, check your background, battery, lighting, audio, and Internet connection.
6. Promotion: Do promotion of your live stream on social media platforms, via emails, via WhatsApp at least 48-72 hours in advance, and also release your trailer on Youtube.
7. Engage audience till the end: We must engage our audience till the end by giving a reason to watch till the end 2-3 times in an hour.
To do so, you can enable live chat, shout out the name of the audience you see and appreciate, and block inappropriate languages or words by assigning a moderator as follow.
Assigning a moderator to manage your YouTube live stream as follow.
1. Open YouTube Studio.
2. From the left, click Settings and then select Community.
3. From the Automated Filters tab, click on the “Moderators” box.
4. Type the name of the user you want to make a moderator.
5. Click Save.
Block certain words on YouTube live streaming as follows.
1. Open YouTube Studio.
2. From the left, click Settings and then click on Community.
3. From the Automated Filters tab and then click on “Blocked words,” enter a list of blocked words.
Messages containing any of these words will be blocked from your live chat.
4. Click Save.
Pro tips to Make your Live vlog more popular on youtube
1. Do ask your viewers to subscribe to your channel.
2. And please note, if you have 10,000 subscribers you can have a live automatic caption feature that makes users friendly to read and listen to what you are saying.
3. Try Youtube Premier to pre-record the event and watch your live stream with your audience. This feature is only available for premium users.
4. Do check Youtube analytics to analyze what works and what not to run a successful stream.
5. And last but not least start your streaming before 30 minutes to make sure every setup is intact.
You may also like:
Summary
Congratulations! You are now ready to take your YouTube content to the next level by going live on the platform. By verifying your account and understanding the live streaming guidelines, you have taken the necessary steps to ensure a smooth streaming experience.
Whether you prefer to use your mobile device, webcam, or encoder, YouTube offers several options for you to choose from to get started. With the right tools and knowledge, you can create high-quality live streams that engage your audience and grow your channel.
So don’t be afraid to give it a try! Experiment with different types of content and formats to find what works best for you and your viewers. With a little practice, you’ll soon be creating amazing live content that sets you apart from the crowd on YouTube.