If you’re an avid gamer, you’ve likely experienced the frustration of a malfunctioning Xbox One controller. Whether it’s a stuck button or a broken trigger, these issues can seriously impact your gaming experience. The good news is that taking apart your Xbox One controller is relatively straightforward and can save you the cost of buying a new one.
Before you begin, it’s important to note that taking apart your Xbox One controller will void any warranty that may be in place. However, if your controller is already out of warranty or you’re comfortable with taking on the risk, then read on.
In this article, we’ll provide you with a step-by-step guide on how to take apart your Xbox One controller. From removing the faceplate to accessing the internal components, we’ll walk you through the process in detail. We’ll also provide tips on troubleshooting common issues and offer advice on how to reassemble your controller once you’re done. So, grab your tools, and let’s get started!
Things to know to disassemble the Xbox One controller safely:
1. Get a t-8 safety Torx, then use a prying tool to remove the grip covers with gentle hands. But first, you have to find a clean, clear workspace with enough light.
2. You have to remove all the screws by using a T-8 safety Trox and remove the battery cover and battery. Remove that assembly from the front case.
3. Now you have access to the inner part, clean all components and replace them gently.
4. Remove the analog stick with the d-pad ring and the d-pad and all.
Before moving to the solution, let’s know a brief about Xbox One Controller.
Xbox One Controller is one of the widest used best video game Controllers around the world.
But as it is an electronic device, it may break down and needs repairing from time to time.
Sometimes you may experience that the joystick is stuck or unruly d-pad on the Xbox One Controller.
To fix such inconvenient things, you will take apart the Xbox One Controller.
To disassemble the Xbox One Controller, you need specialized tools which you don’t find easily around you.
Do this process carefully and don’t lose any screws or other components while disassembling it.
Here’s how to quickly and easily disassemble an Xbox controller in order to try to fix a stuck joystick or unruly d-pad.
Reasons to Take Apart Xbox One Controller
If your Xbox Controller is not able to run there is definitely some problem.
I hope you will try to fix it with the basic troubleshooting methods and have already updated the firmware.
You can take apart Xbox One Controller to do some more fixes. Here there are some reasons that lead to this type of problem.
1. Drifting analog Sticks: To solve this, you have to clean the analog sticks and if necessary, you can replace them.
2. Malfunctioning D-Pad: You can solve this problem by carefully prying up the tabs which are on the spring assembly.
This will push them down with more force, moreover, you can replace them if required.
3. Inoperable audio jack: You have to check the jack is properly set up or connected and replace them if required.
4. Sticking Buttons: For this problem, you will need to clean them. You can use canned air or any other method to remove the dust stick to it.
It is possible after removing the circuit board assembly from the controller housing.
How to Take Apart Xbox One Controller?
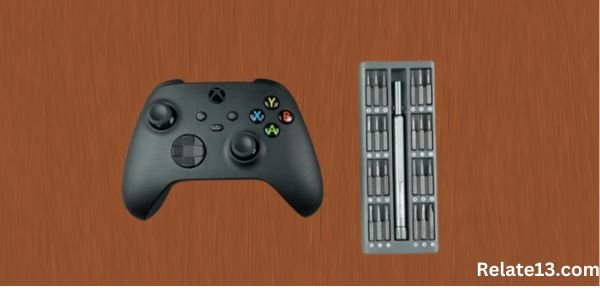
For doing the process, you need some tools that are the T-8 safety Torx and Prying tool. Always choose a clean and clear surface for doing this process.

It is advised to use a T-8 Safety Torx which has a bit in a driver with a socket wrench or a dedicated Torx driver.
Steps to disassembling the Xbox One controller
Follow the steps below to take apart the Xbox One controller.
1. Use a tray to avoid any loss of the screws or other parts of the Xbox One Controller.
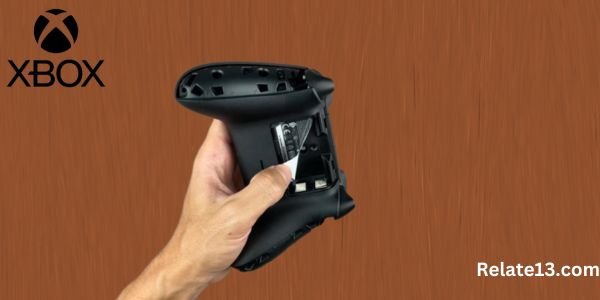
2. First of all, use a prying tool to separate the left or right grip cover.

3. After the covers start to separate, use your hands to carefully pull them off.
4. Remove both grips with this process.
5. Remove your battery cover and the battery.

6. Now you can unscrew the device. Start with the hidden screw inside the battery place. Use the T-8 safety Torx bit and do this process carefully.
7. Now unscrew the screws at the grip with the help of a Torx bit or driver.

8. Do this for both of the grips.
9. When you unscrew the controller, it will come apart.
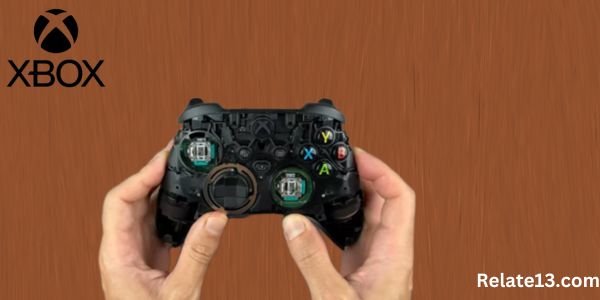
10. Now you will get access to the various components of the Xbox One controller.

Includes rumble motors, triggers, and additional screws that should be untouched unless you need to replace any of the components from the Circuit board.
To get access to more components, you need to remove the assembly from the front end and take it out.
11. Here you can remove the analog sticks, d-pad ring, d-pad, and many more.
You can replace them if needed otherwise you need to clean the buttons and all other components.
12. If your d-pad isn’t working correctly, fix it. Use a prayer tool or tweezer to pop off the spring steel d-pad ring.
13. Lift the d-pad arms, it will apply more pressure, and reassemble it. If the problem still persists, you need to replace it with a new D-pad ring.
14. To reassemble the controller when you have done it, just reverse the steps.
15. Set the rear and front cases in their place, tighten the screws, and place the battery in the battery case.
And finally, close it with the grip covers.
Things To Note
When you take apart the Xbox One Controller and attempt to do the repairs. It will fix some of the issues but I’m not sure that all the problems will be fixed.
You can fix some problems by cleaning the components or replacing those which are damaged.
After you have successfully done the steps check if your controller works if yes that we are good if not, move to the advance repairing options.
For this, you need skills like soldering to remove and replace minor components. But do it only if you have experience otherwise hire a professional technician to do this task.
Without proper technical knowledge, the situation becomes worse.
You may also like:
- Why Does My Xbox Keep Turning Off
- Xbox Controller Keeps Turning Off
- PlayStation 5: Everything You Need To Know About Sony
- How To Reset Xbox One, S, And 360 Password
Conclusion
In conclusion, taking apart your Xbox One controller is a great way to troubleshoot common issues and save money on purchasing a new one. With the step-by-step guide provided in this article, you should now have the knowledge and confidence to open up your controller, access its internal components, and even fix any issues you may encounter along the way.
Just remember, taking apart your Xbox One controller can be a risky endeavor and should only be attempted if you’re comfortable with the possibility of voiding your warranty. If you’re unsure or hesitant about the process, it’s always best to seek out professional help.
Overall, we hope this article has been helpful in guiding you through the process of taking apart your Xbox One controller. So the next time you encounter a problem with your controller, you’ll have the knowledge and tools to fix it on your own. Happy gaming!
FAQs
Is it safe to take apart my Xbox One controller?
Taking apart your Xbox One controller can be risky and may void any warranty that is in place. However, if your controller is already out of warranty or you’re comfortable with taking on the risk, it can be a great way to troubleshoot and fix common issues.
What tools do I need to take apart my Xbox One controller?
To take apart your Xbox One controller, you’ll need a T8 security screwdriver, a plastic sludger, a Phillips-head screwdriver, and a pair of tweezers.
What are some common issues that can be fixed by taking apart my Xbox One controller?
Common issues that can be fixed by taking apart your Xbox One controller include stuck buttons, broken triggers, and unresponsive joysticks.
Can I reassemble my Xbox One controller if I take it apart?
Yes, you can reassemble your Xbox One controller if you take it apart. Just make sure to follow the step-by-step guide carefully and keep track of all the screws and components.
Should I attempt to take apart my controller if I’m not confident in my skills?
If you’re not confident in your skills, it’s best to seek out professional help or purchase a new controller instead of risking damage to your current one.